


The ability to work with 99 tracks of video and audio is a tremendous feature of Final Cut Pro. Editors are able to build projects vertically as well as linearly for richer, deeper content. When working with multiple clips (on a single track or on multiple tracks) it’s sometimes necessary to apply the same filter, or motion effect to a group of clips, for example to burn timecode across a whole sequence or to rotate several clips as a group. While it’s possible to apply the filter or effect to each clip in the group and adjust the individual settings, that’s a rather tedious task made simpler using FCP’s Nest Items feature. Nesting lets you treat several clips as if they were a single clip.
Here is an example of how nesting makes your editing life better.
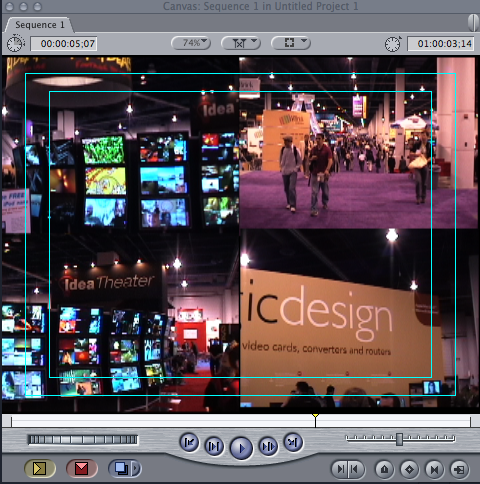
1. A client wants you to create a 4-up video wall (see figure 1) and rotate the videos around the center of the screen. The first part is straight forward; create four tracks in the Timeline, edit a video clip into each track, scaling each clip down so that all four are visible in the Canvas. Now rotating the clips a group is a bit trickier. The hard way is to adjust the anchor point on each clip the the center of the canvas and then keyframe the rotation motion effect for each clip. Way too much work.
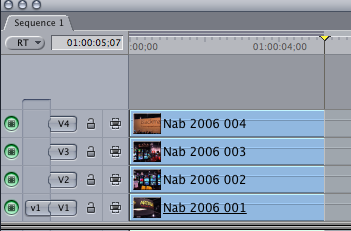
Here’s the easy way. Nest the four tracks and keyframe a single rotation. Select the clips in the four tracks (see figure 2) and select Nest Item(s) from the Sequence Menu (or press the Option-C keyboard shortcut).
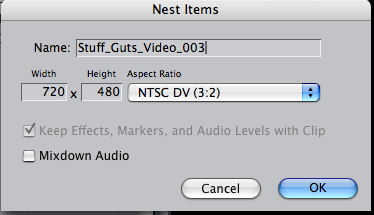
Enter a name for the nested sequence in the Nest Item(s) dialog box that appears and click Okay (see figure 3).
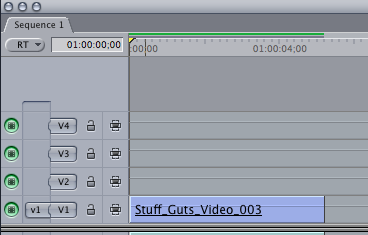
FCP moves the four clips into the new sequence that you just named and replaced them in the current sequence with the nest (see figure 4).
Just load the nest into the viewer and keyframe the rotation effect.
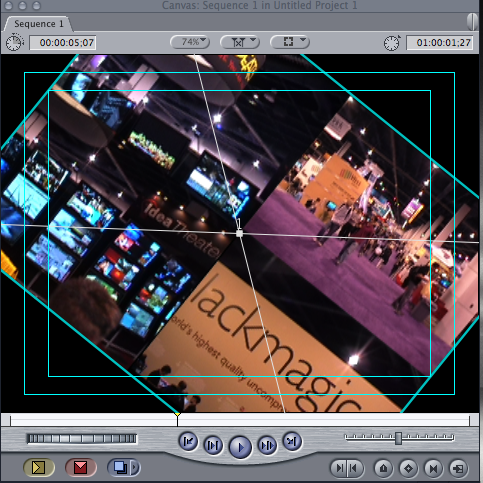
Oops, did you double-click to load the nested clips into the viewer? Surprise, instead of loading the nest into the viewer, double-clicking opened the nested sequence. Click on the original sequence and hold the Option key down and then double-click. The nest should now be loaded in the viewer to keyframe the rotation (see figure 5 for the result).
In our next episode I will describe another example of using nesting and coming up I will discuss object oriented editing.
Stay Tuned!


Wow, this tip is great, I just bought FCExpress and I love tips to help me learn.