


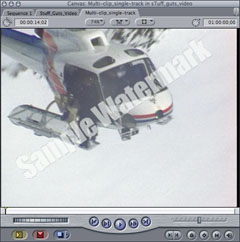
On our last episode I showed and example of nesting multiple clips on multiple video tracks to animate them as a group. This second part of the show discusses nesting multiple clips on a single track. When sending videos out to be screened by reviewers or to have music scored or other post production work performed it is often necessary to add a watermark (for piracy prevention, see figure 1),
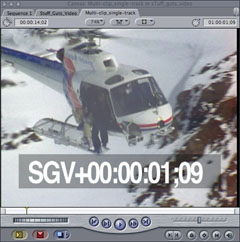
or timecode (for reference, see figure 2). This can be done the hard way: adding the watermark or timecode filter to each clip individually and adjusting each clip’s settings. Or it can be done the easy way: nest all the clips into a single sequence and add the watermark or timecode filter one time.
Here’s how it works by the numbers:
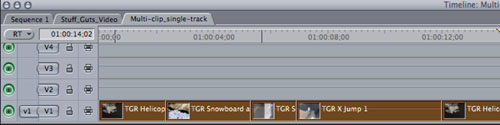
1. Select all the clips in the video track (see figure 3).
2. Nest Item(s) from the Sequence Menu (or press the Option-C keyboard shortcut).
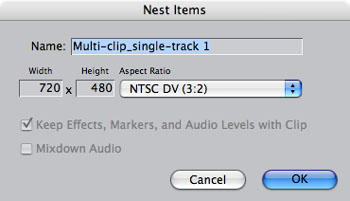
3. Enter a name for the nested sequence in the Nest Item(s) dialog box that appears and click Okay (see figure 4).
4. FCP moves the clips into the new sequence that you just named and replaced them in the current sequence with the nest (see figure 5).

5. Superimpose the watermark file (still image or video) over the nested sequence and adjust the opacity to taste.
Or
6. Apply the Timecode Generator filter. Remember to hold the Option Key down when double-clicking to load the nest into the viewer to tweak the filter settings. Season to taste.
Once you get the hang of it it’s amazing how nesting can simplify your editing life.
The next episode will discuss object oriented editing. Look for it.


Thank you, i was just editing a video for an AMV contest, and was wondering just how one can merge clips. You saved me man.
keep it up.