


Each video editor has their own style and unique workflow, and Final Cut Pro’s remarkable flexibility—from clicking buttons, selecting menu commands, to using keyboard shortcuts—allows editors to work the way they like best. No matter how you work in FCP, using keyboard shortcuts can make you a quicker, more efficient and agile editor. Here are a few keyboard short cuts that, with practice, can improve your clip trimming performance in FCP.
Normally when trimming clips in the timeline an editor selects the appropriate tool (usually the ripple, or arrow tool), then clicks and drags on the edit point to perform the required trim. If your playhead is near the edit point of the intended trim then press the V key to select the edit point. The V key selects the edit point nearest the playhead location (see figures 1 and 2).
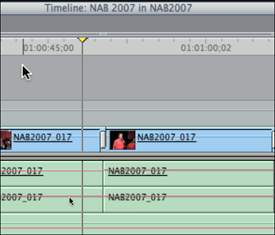
Figure 1: Unselected Edit point near playhead before tapping the V key.

Figure 2: The edit point nearest the playhead now selected after tapping the V key.
Using the Up and Down Arrow keys or J-K-L navigation keys also helps get the playhead to the desired edit point.
With the edit point selected the U key toggles between the Ripple and Roll edit functions. Just keep tapping the U key to choose the desired edit type (see figures 3-4).
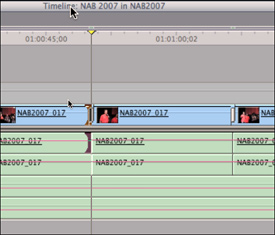
Figure 3: Tapping the U key to toggle the Ripple function on the Out Point of the Outgoing clip.
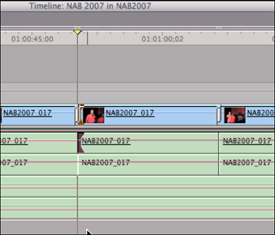
Figure 4: Tapping the U key to toggle the Ripple Function on the In Point of the Incoming clip.
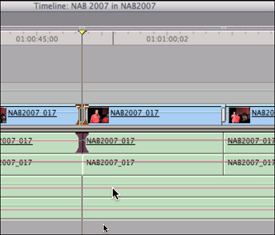
Figure 5: Tapping the U key to toggle the Roll function on the selected edit point.
Using the left and right bracket keys ( [ or ] ) will Ripple or Roll the edit point one frame. The Shift left and Shift Right bracket keys edit the number of frames entered in the multi-frame trim size field in the user settings > Edit Tab. The default is five frames. One the edit point is selected and the type of edit chosen with the U key, you can also trim by precise numeric values by typing that value on the number row or numeric keypad of the keyboard (this works without having to first click on the Ripple or Roll tools in the Toolbar). Positive number values move edit points to the right, negative number values (type a minus sign before the number) will move edit points to the left.
That’s really all it takes to quickly trim a rough cut down to time. Using the Up and Down Arrow keys to move the playhead forward and backward between edit points or J-K-L to move the playhead forward (L), backwards (J), or stopping (K). V to select the edit point nearest the playhead, U to toggle the edit type and [ or ] (or Shift-[, Shift-], or numbers) to perform the trim edit. It might feel a little awkward at first, but with practice it will become second nature.
In the next episode I’ll show how to gain more precise placement control of video clips in the Canvas. See you then.

