The MacCast » James Alguire

Stuff, Guts, and Video 008B

Written by: James Alguire

Categories: Mac Pro

by James Alguire

In the last episode on saving filters and effects I missed one cool option for saving several filters at once. I did mention organizing several related effects into one bin, but Final Cut Pro can do that for you, at least with multiple filters. Simply load the clip with the group of filters to be saved (see Figure 1).

Clip with filters applied
Figure 1: A ciip with several filters loaded in the Viewer Window.


Continue Reading »

Stuff, Guts, and Video 008

Written by: James Alguire

Categories: Mac Pro

by James Alguire

You spent hours fiddling, adjusting and tweaking the parameter settings for a particular effect (filter, transition, or motion) until it looks great. Now twenty-five additional copies of the same effect are needed. But rather than spending several more hours replicating the effect each time, Final Cut Pro provides several ways to easily save effects to reuse in the current project or future projects.
Continue Reading »

Stuff, Guts, and Video 007

Written by: James Alguire

Categories: Mac Pro

by James Alguire

iMovie users have it easy. Because of the integration within the iLife applications, iMovie users can quickly and easily tap images from iPhoto, within iMovie, to create still image sequences. Final Cut Pro users have to export the photos from iPhoto or Aperture, then import them. Now Final Cut Pro users can quickly and easily create still image sequences, complete with transitions, right from Aperture with Connected Flow’s Aperture to Final Cut, Aperture plug-in.

Here’s how it works.

Download the free Aperture to Final Cut Pro plug-in from Connected Flow’s web site, http://connectedflow.com/aperturetofinalcut, and install. Aperture to Final Cut Pro requires Mac OS X 10.4 or later and Aperture 1.5.1 or later and Final Cut Pro 5.1.2 or later.

In Aperture create an album with the images to be used in FCP, and adjust and arrange them in the order they are to play back (see figure 1).

Arrange and Tweak Images in Aperture
Figure 1: Arrange and tweak images in Aperture.
Continue Reading »

Stuff, Guts, and Video 006

Written by: James Alguire

Categories: Mac Pro

Final Cut Pro’s real-time playback features save a tremendous amount of time while working on projects. Add a transition here, a video layer there, or tweak a filter, and you need not worry about rendering the results just to confirm everything works as expected. But even on the most powerful Mac hardware real-time playback has it’s limits, as it is truly a real-time previewing system. Situations requiring rendering to view, no matter how good the Mac is, include: complex or rich video projects containing many video and audio tracks (especially if the project is HD), clips with multiple filters applied, or projects that incorporate native Motion or LiveType project files. When content in a Timeline sequence requires rendering, red bars appear above the Timeline’s ruler bar (See Figure 1).

Video Clip with multiple Filters
Figure 1: Clip with Multiple filters applied showing render bars.

Continue Reading »

Stuff, Guts, and Video 005

Written by: James Alguire

Categories: Mac Pro

This episode is inspired by a question from a reader regarding problems they experienced applying transitions to clips in a sequence. As it turns out, the problem wasn’t with the transitions themselves, but with the lack of handle material in the clips. So let’s talk about handle material.

Handle Material consists of the frames of video that sit outside the In and Out points set to define the portion of a video clip to be edited into a sequence. Handle material is created in Final Cut Pro and Final Cut Express whenever In and Out points are set in a video clip loaded into the Viewer. Handle material can also be created during a batch capture from a video tape in Final Cut Pro. Figure 1 shows a video clip without handles and Figure 2 shows a clip with handles.

Video Clip Without Handle Material
Figure 1

Video Clip With Handle Material
Figure 2


Continue Reading »

Stuff, Guts, and Video 004

Written by: James Alguire

Categories: Mac Pro

This episode I’m discussing object oriented editing. Now, at first, that may sound a lot like programming and I did steal the term from object-oriented programming but the core idea is the same. Take a larger project and break it down into smaller reusable chunks. By dividing a project up into discrete sections it can make the project easier to manage. So how do you break a video project down into smaller reusable chunks?

Each project type determines how well this technique works, but it can be especially beneficial to event videographers. Let’s look at shooting a wedding as an example. A wedding can typically be organized into several distinct sections:

Pre-ceremony
Ceremony
Reception

Additionally there could be a pre-wedding party where the families meet.

Pre-ceremony can be divided into: Preparations and Set up, the Newlyweds and Wedding Party Getting Ready and Photos.

The reception can be broken down to: Arrival and Mingling of Guests, Arrival of the Newlyweds, The Dinner, Toasts, First Dance, Cutting of the Cake, Garter Toss, Bouquet Toss, More Dancing and Fun, Guest Interviews, The Departure of the Newlyweds, and Post Reception Madness.

What’s nice about this is that most weddings pretty much follow the same format. So, shoot one wedding and edit it together and you have a template for the next wedding. This can also work for Birthdays, Retirements, Bar/Bat Mitvahs, Roasts, etc.

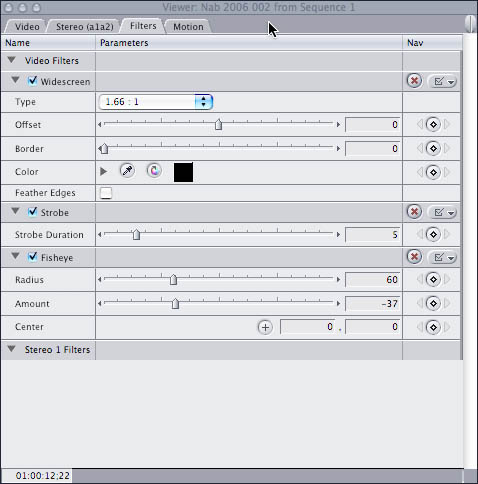
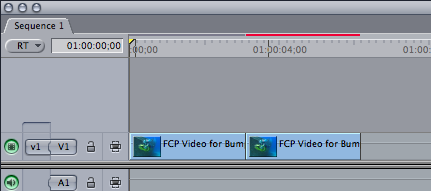
Because Final Cut Pro treats sequences as if they were video clips, create individual sequences for each discrete component or section of the project, and combine the component sequences together in a final master sequence. This can streamline the editing process, as each component sequence or “object” can be edited more quickly with greater focus.

When working with a group of editors, each sequence can be assigned to a different editor and combined by a supervising editor, again creating a more efficient workflow. Another benefit is when changes are made. In most cases, only the component sequence needs to be adjusted. Changes made to the individual sequences are automatically updated in the master sequence.

Once a project is set up this way it can be used as a template for similar projects. So for the next wedding (or other event) project open up the previous Final Cut Pro project and save a copy. Import the new footage and use replace edits to replace the old material with the new material. A few title and style changes later the project is ready for output. This helps finish event projects more quickly, allowing you do do more events per year.

This technique may not work equally well for all projects, but if you think about how the project is organized and how it can be broken down into smaller bites, it can definitely help make editing faster and more fun.

See you next episode.

Stuff, Guts, and Video 003B

Written by: James Alguire

Categories: Mac Pro

On our last episode I showed and example of nesting multiple clips on multiple video tracks to animate them as a group. This second part of the show discusses nesting multiple clips on a single track. When sending videos out to be screened by reviewers or to have music scored or other post production work performed it is often necessary to add a watermark (for piracy prevention, see figure 1),

Figure 1

or timecode (for reference, see figure 2). This can be done the hard way: adding the watermark or timecode filter to each clip individually and adjusting each clip’s settings. Or it can be done the easy way: nest all the clips into a single sequence and add the watermark or timecode filter one time.
Continue Reading »

Stuff, Guts, and Video 003A

Written by: James Alguire

Categories: Mac Pro

The ability to work with 99 tracks of video and audio is a tremendous feature of Final Cut Pro. Editors are able to build projects vertically as well as linearly for richer, deeper content. When working with multiple clips (on a single track or on multiple tracks) it’s sometimes necessary to apply the same filter, or motion effect to a group of clips, for example to burn timecode across a whole sequence or to rotate several clips as a group. While it’s possible to apply the filter or effect to each clip in the group and adjust the individual settings, that’s a rather tedious task made simpler using FCP’s Nest Items feature. Nesting lets you treat several clips as if they were a single clip.
Continue Reading »

Stuff, Guts, and Video 002

Written by: James Alguire

Categories: Mac Pro

Contour ShuttlePROQuickly scrubbing through video clips to locate the precise portion of a clip to use in a project is a common event for video editors. Final Cut Pro offers several methods to scrub through video and there are useful USB devices that can aid in quickly locating that special scene.

The onscreen jog wheel and shuttle controls in the Canvas and Viewer windows are adequate, but the J-K-L keyboard commands are more efficient. J is backward playback, L is forward playback, and K stops playback. The more times the J or L keys are tapped the faster the video plays back. If the L key is tapped a few times to speed up forward playback, tapping the J key will slow down playback. The reverse is also true. If the J key is tapped to speed up reverse playback, tapping the L key will slow reverse playback down. Holding the K key down and then holding the L or J key down provides slow motion forward or reverse playback.

USB controllers, like the Contour ShuttlePRO V.2 ($110) or Contour ShuttleXpress ($60), from Contour Designs (http://www.contourdesign.com ), provide jog and shuttle controls (along with several user programmable buttons that can be configured for other Final Cut Pro functions) to help scrub through video in Final Cut Pro, but having a mouse with a scroll wheel will save you some cash. Simply move the cursor in Final Cut Pro over the Viewer or Canvas and roll the mouse’s scroll wheel up and down to scrub through the loaded video clips (if in the Viewer) or sequences (if in the Canvas). Even better is Apple’s new mighty mouse with it’s mini-trackball Scroll up and down to scrub through video in the Viewer and Canvas, and left and right to quickly scrub through the timeline on long projects.

Stay tuned!

Stuff, Guts, and Video 001

Written by: James Alguire

Categories: Mac Pro

Stuff, Guts, and Video posts are Hints and Tips to help get more from Apple’s Pro Applications.

There are at least three ways to perform most of Final Cut Pro’s functions; Onscreen Buttons and tools, Menu Selections, and Keyboard Shortcuts. While the novice FCP user will edit primarily with buttons and menus the professional learns and uses the keyboard shortcuts needed to get work done more efficiently. Developing a commanding grasp of the essential keyboard shortcuts is one key to editing quicker and smarter in Final Cut Pro.

Not every function in FCP essential to your video editing workflow will have a corresponding keyboard shortcut out of the box. Fortunately Apple provided tools to create new shortcuts or modify existing ones in Final Cut Pro 4.X and later. Here is a good example. To import files, you could use the Command-I keyboard shortcut, but if you have organized video, audio and still image in several folders it would be better to use the Import Folder command which has no keyboard shortcut. Here’s how to make one!
Continue Reading »