


Final Cut Pro’s real-time playback features save a tremendous amount of time while working on projects. Add a transition here, a video layer there, or tweak a filter, and you need not worry about rendering the results just to confirm everything works as expected. But even on the most powerful Mac hardware real-time playback has it’s limits, as it is truly a real-time previewing system. Situations requiring rendering to view, no matter how good the Mac is, include: complex or rich video projects containing many video and audio tracks (especially if the project is HD), clips with multiple filters applied, or projects that incorporate native Motion or LiveType project files. When content in a Timeline sequence requires rendering, red bars appear above the Timeline’s ruler bar (See Figure 1).
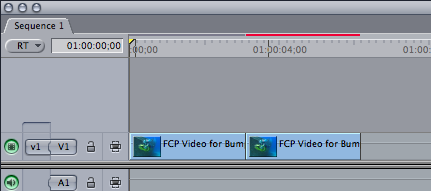
Figure 1: Clip with Multiple filters applied showing render bars.
Fortunately Final Cut Pro’s QuickView tool can preview portions of video compositions that would normally require rendering in order to be seen. Select the QuickView tool from the Tools menu (or use the Option-B keyboard shortcut) and it appears as a Tab in the Tool Bench Window (see Figure 2).
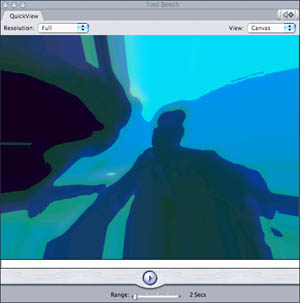
Figure 2: QuickView Tab in Toolbench Window.
QuickView can display a range of frames from the Timeline from 2 to 10 seconds using the range slider at the bottom of the QuickView Tab. The playhead location in the Canvas or Timeline determines the location in the sequence of the range of frames. If a two second range is selected QuickView will cache one second before the current playhead location to one second after the playhead location. Moving the playhead will change the range of frames that are cached and played back. A range of frames can also be selected by marking In and Out points in the Timeline (see Figure 3 and Figure 4).
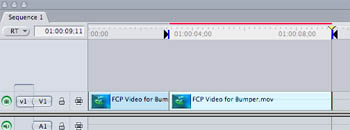
Figure 3: Setting QuickView preview range using In and Out points in the Timeline.
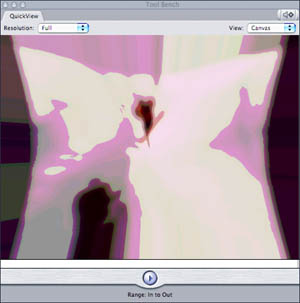
Figure 4: QuickView Window with In/Out point range set.
Click the play button and QuickView caches all the frames of the selected video range into RAM. This takes a moment or two depending on the performance of the Mac and the number of frames to be cached. Once the frames are cached the video plays back in the QuickView Tab in real-time. Playback also loops until the play button is clicked again to pause. Make a change to the video being previewed during playback (adjust a filter, motion parameter, transition, etc.) and QuickView will reload the frames on the fly.
QuickView’s other options are the Resolution and View Pop-up Menus at the top of the QuickView Tab. The Resolution Pop-up Menu provides selections for changing the playback resolution to quarter, half, or full resolution. This does not effect the actual resolution of the final rendered video, only QuickView’s playback. Choosing the lower resolutions provides faster playback and a greater range of frames. The View Pop-up Menu determines whether QuickView loads video from the Canvas, Viewer, or not at all.
QuickView is definitely a handy tool for spot checking effects and composites in projects without having to spend the time rendering them beforehand.
Next episode we’ll examine a new Aperture to Final Cut Pro workflow tool, and in upcoming episodes we’ll look at more of the tools located under the Tool Menu. And let me know if there is something you want to know more about in Final Cut Pro Studio.


will this work with FCE?